Showing posts with label Italians. Show all posts

Saturday, February 8, 2014

Bersaglieri Motociclisti, Part 2

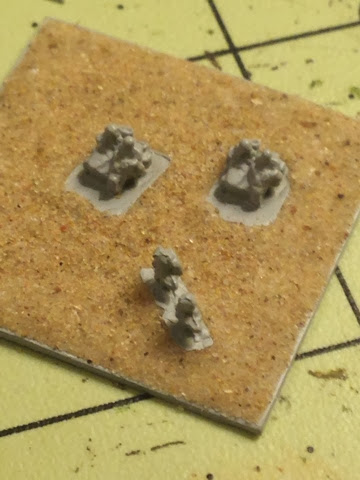
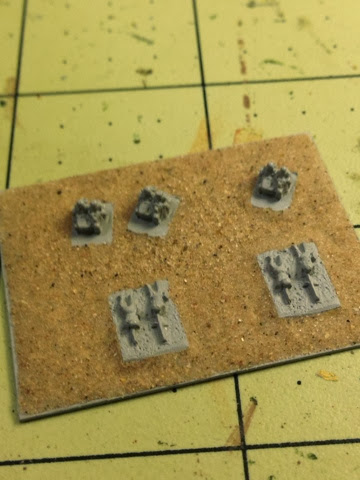
Continuing on from Part 1, here is my platoon of Bersaglieri Motociclisti, as well as the command stand, the anti-tank rifle squad, and the heavy machine gun platoon. Italian platoons (and for that matter, squads too) were twice the size that they were in other armies, so I'm forced to do half-platoons per stand, as even at this scale, 8 per stand would be far too many. You'll see not all have been painted, textured, etc, but at least they're based now:
You'll note that I'm forced to use those damned Soviet PTRD anti-tank rifles again. The Solothurn rifles that I need, O8 doesn't make. As you can see, the PTRD and the Solothurn look nothing alike:
Well, I'll have to use what's available, like it or not. Grrrrrr! For heavy machine guns,
I didn't have enough Italian ones, but I did have a number of Soviet ones lying about that I've never had a use for, so a bit of filing and they are now perfectly serviceable as Italians. 

Ok, now we pause on this topic until I can get everything textured and painted. Stand by. 


Monday, December 30, 2013

Santa was a few days late, but he made it!

It's five days after Christmas, but a couple of packets came today!! Yay!!

The first was from Tumbling Dice in England. I noticed that they have 1/600 British 18 pounders in their WWI section. These were also used quite widely in WWII by the Royal Artillery in the Battle of France and the early stages of the war in North Africa
Unlike O8's, they don't come molded with crew on a small base, so I'll have to adapt some infantry figures, but it'll make a nice addition to the ever-present 25 pounders and 2 pounder anti-tank guns. Also, the modernized 18 pounders that were used in WWII looked different than the WWI version, but it's as close as I can get. 

I also got some of their Italian aircraft. Not too many companies make 1/600 aircraft, so I try to get the widest variety I can find. I bought a bag of Caproni Ca. 310's:
And some IMAM (or Meridionali if you prefer) Ro. 37 bis:
The landing gear and top wing are separate pieces and talk about fiddly to get them glued on straight and level, especially that wing!! More swearing!!

The second packet was from Stone Mountain Miniatures. Another bottle of their own "mud" paint, which I really like and use a lot of, as well as a 1/285 four-winged guildhall:
I've ordered buildings from them several times in the past and was always impressed. Never a bad casting and no clean up necessary. This time, there is a bit of obvious bubbling that needs filling in and a fair bit of "flash" to be cleaned off. Still, a very attractive and unusual building to add to my German city center. 

I also got a Tamiya paint mixing jar to make up the grayish sky blue on the undersides of East German aircraft, but that's hardly photo-worthy. 

Yay for St. Nick! He always comes through with the good gifts. Actually it was Mrs. History PhD, bless her heart!
I love you sweetheart :-*

More in the New Year!!

Sunday, December 29, 2013

East German infantry stands, etc.

Well, as promised, my first East German infantry platoon stand is finished:
If anyone tells you the gem about 3mm infantry being the easiest scale to paint, loudly call him a varlet and a knave and soundly thrash him from your presence. As you can see, I make no attempt at details. Mono-color uniform, boots, weapon, helmet, and a dot of flesh for a face. That's it. Yet, they are SO tiny that even my 20/0 detail brushes are too big. Paint slops everywhere and I'm forced to tidy up paint messes with a toothpick!! Mrs. HistoryPhD says swearing is the rule and not the exception when I paint, but that I was in rare form tonight. Thank God I don't need hundreds of these damned things!

I also finished off my Italian AB40 armored cars for North Africa. Two platoons worth:
I think they came out quite well, given that they are the only 3mm Italian armored cars made and not the type I actually need. I'll have to make at least one command stand too.

That finishes off this weekend. More on New Year's Day!!

Sunday, December 8, 2013

Odds and ends

As George Carlin once said: "If there are 24 odds and ends on a table and 23 fall off, what's left, an odd or an end?"

Anyway, on a bitterly cold weekend, I've not gotten any big project accomplished, though I have worked on my scratch-built 1/285 CNN truck:
A company called Ngineering makes satellite dishes in HO and N scales. The HO is perfect for a large dish in 6mm. As you can see, I also took the opportunity to build a Soviet Fire Can radar for my East German 57mm AA guns. The trailer began life as a Heroics & Ros WWII German command trailer. Not one of their best models, I must say. Here's the real thing:
In the same order, I also bought a couple of Soviet "Track Dish" radars, originally Skytrex but now H&R:

I've also tried to get some Italian WWII Bersaglieri based for the Western Desert 1940:
That's one squad. Italian army squads were twice the size of those in other armies, approx. 24 men, including command, plus a light machine gun and crew. 

Also finished a 3mm East German motor rifle company in BTR-60PB's and a BTR-60PU command vehicle:
I always put a couple of infantry on a command or FAO/FAC stand to help identify them. 

That's it for this weekend!

Sunday, December 1, 2013

The holiday weekend's parting shot

Last day of my long four day weekend, so just a few miscellaneous bits and pieces that I've finished off. 

My Bersaglieri will be relieved to see that I've gotten them some support. A battery of 25mm anti-tank guns (captured French Hotchkiss guns):
A battery of 65mm infantry support guns:
And also a battery of Breda 20mm anti-aircraft guns, to keep the British Desert Air Force at bay:
I'm also working on batteries of Italian 75's and 105's. As you can see, I've yet to find a color of paint that really blends with the sand I use for basing. Damn!! Well, that's all for this weekend. More next time!


Friday, November 8, 2013

I'm not happy with my Italian armored cars!

I got a shipment from Picoarmor this week and among the things I received were some Italian AB40 armored cars. 
That's them filed and primed. As you can see, they're actually quite good representations of AB40's. 

However....as my readers will know, I'm trying to represent the Italian Army that invaded Egypt in 1940. AB40's were about the least used of all Italian armored cars, because only 24 were made before the production lines were converted to making AB41's. What I need are models of the two armored cars the Italians did use in fairly large numbers in the desert in 1940, the Fiat 611:
And the Lancia IZM:

However, O8 doesn't make them, so I have no choice but to grit my teeth and use the AB40's. Oddzial Osmy needs to make some other choices in Italian armored cars. Marcin, I hope you read my blog!!!

Sunday, October 6, 2013

Painting Italians for the Western Desert

This weekend, I thought I'd give my method for painting Italians in North Africa, as much for my own "leaving a note" for myself, as for you all. 

Firstly, let me say that for 3mm, adhering to strictly historical colors is not the best way to approach things. This small scale requires a slightly exaggerated and perhaps even somewhat cartoonish approach to painting. 

I always prime light grey, then anything that will be any sort of sand color, I give it a base-coat of Green Ochre (V914). After looking at a lot of photos of Italian vehicles and uniforms, here are the colors I've settled on for infantry (I use almost exclusively Vallejo colors for my Italians):

For Fucilieri and Bersaglieri: 

Helmet: Green Ochre (V914)

Face and hands: Stone Mountain Ruddy Flesh (a good "sunburned" color)

Tunic & trousers: Desert Yellow (V977)

Boots and leatherwork: Saddle Brown (V940)

Rifle: Mahogany Brown (V846) with a strip of Gunmetal Grey (V863) along the top

Bersaglieri capercaillie feathers: Black Green (V980)
For Blackshirts, I omit the Desert Yellow tunic and use Black Grey (V862) instead. Sahariana jackets are Stone Grey (V884), for those officers who have them. Larger infantry weapons are generally all Gunmetal Grey (V863). I realize these are crap photos, but the macro ability of an iPhone 5 is pretty much zero. I also plan to give some Bersaglieri dark beige brown tunics after finding this photo:

Armored vehicles seem to have had three different color schemes in the early phase of the Desert War: brick red with dark green patches (this seems to have been exclusive to L3/35's):
Sand yellow with dark green splotches or wedge shapes:
Or just overall sand yellow.
So I use these three to easily differentiate between types of tanks. 

L3/35: Red Leather (V818) with Olive Grey (V888) splotches:
M11/39: One part Sand Yellow (V916) mixed with one part Green Ochre (V914) as a base and Olive Grey (V888) splotches:
This is the paint scheme that the British Tommies referred to as "sand and spinach".

M13/40: One part Sand Yellow (V916) mixed with two parts Green Ochre (V914):
I've found that uncut Sand Yellow gives a color that's too bright; almost "neon sand", if there is such a thing. 

The majority of soft-skin vehicles that the Italians sent to North Africa were never repainted for the desert and served in their European dark gray-green color, therefore I paint most trucks, etc in overall Olive Grey (V888), however I do throw in the occasional sand-colored one for variety. I use several colors for tarpaulins: Khaki Grey (V880), Canvas (V314), and Russian Green (V924). 

Tank tracks are Black (V950) heavily dry-brushed with Oily Steel (V865). Tires are Dark Rubber (V306). Windshields and windows are Black Grey (V862). Mufflers and any other areas needing rust are Light Rust (V301). Any weapons (AAMG's, etc) are Gunmetal Grey (V863).

Everything, infantry and vehicles, gets a couple of coats of Sepia Wash (V200). Tanks get a couple of further washes inside the tracks to add shadowing. The last step is a spray of Dullcote. 

That's my formula for the Italian Army in North Africa. Again, my apologies for the quality of the photos. 

Saturday, September 7, 2013

Desert bases, plus odds and ends

Another weekend is upon me and my shipment from Picoarmor arrived, as well as one from Heroics & Ros, which included a very cool Timecast 6mm German church.
That's the painting supervisor and head of security in the first photo. 

My Picoarmor order included Italian M13/40's, Bersaglieri infantry, British QF 2pdr anti-tank guns, and French 25mm Hotchkiss anti-tank guns, which the Italians used in some numbers in North Africa. It seems appropriate to talk about how I go about making my desert bases. 

I start off with a thin metal base from Wargame Accessories and glue down anything that has it's own base, then I prime it. 
These are the Hotchkiss 25mm's. Anything that doesn't have it's own base will sit on top of the finished sandy base, not be imbedded in it. Now I liberally coat the base with undiluted PVA glue (Elmer's). 
Then I use an old paint brush to push the glue evenly around the base, making sure it's right up to the edges of the miniatures. 
After a new house was built across the street from my apartment, the builders very kindly didn't think it was worth their time to scoop up the little leftover piles of fine sand they'd used to mix their cement, bless their hearts. So I took one of Mrs. History PhD's Tupperware containers and filled it up (kids, always ask your wife's permission before doing this!). I threw in a small handful of cat litter (unused, needless to say!!) and that's my desert material. 
Now I pour a handful over my glued base
And this is what I end up with. As it dries, little gaps open up in the glue/sand mixture, so I fill them in with a touch more glue/sand. Normally, I'd pretty much leave that alone, but as you can see, the bases of the miniatures have to be painted a color that more or less matches the rest of the larger base, which isn't easy because no paint is a good match. Here are some Italian 47mm anti-tank guns:
That necessitates a lot of dry brushing with various different shades of sand, a touch of light gray, and very watered-down patches of pale rust, in an effort to get everything to blend together.
It's a whole lot easier to do bases where the vehicles have no molded-on base of their own and simply sit on top of the sand. A little bit of dark brown earth flock or burnt grass flock and maybe a pale green bush and that's it!

Those are my shirtless Italian anti-tank gunners. A spray with Dullcote and I'm finished. If anyone has more attractive/realistic desert bases, I'd love to know because I'm not 100% satisfied with mine. 

And just to show that I'm not a "one trick pony", here are some Adler 6mm 1806 Saxons I've finished. Dragoons:
Hussars:
And a battalion of infantry:
I haven't textured or flocked the bases yet though. They're based for Baccus' Polemos rules. And a Saxon general who's finished:

That's it for this weekend!